Uniflite Salty Pup Refit
- Gisteppo
- Commodore
- Posts: 1016
- Joined: Fri Jun 22, 2007 11:26 am
- Location: Lake Spokane (Long)
- Contact:
Uniflite Salty Pup Refit
Talked with Aaron, he says this might be of interest, so I'm back!
You can get caught up on the story here:
http://www.stagboatworks.com/?p=865" onclick="window.open(this.href);return false;
And we will jump in with both feet to the current update:
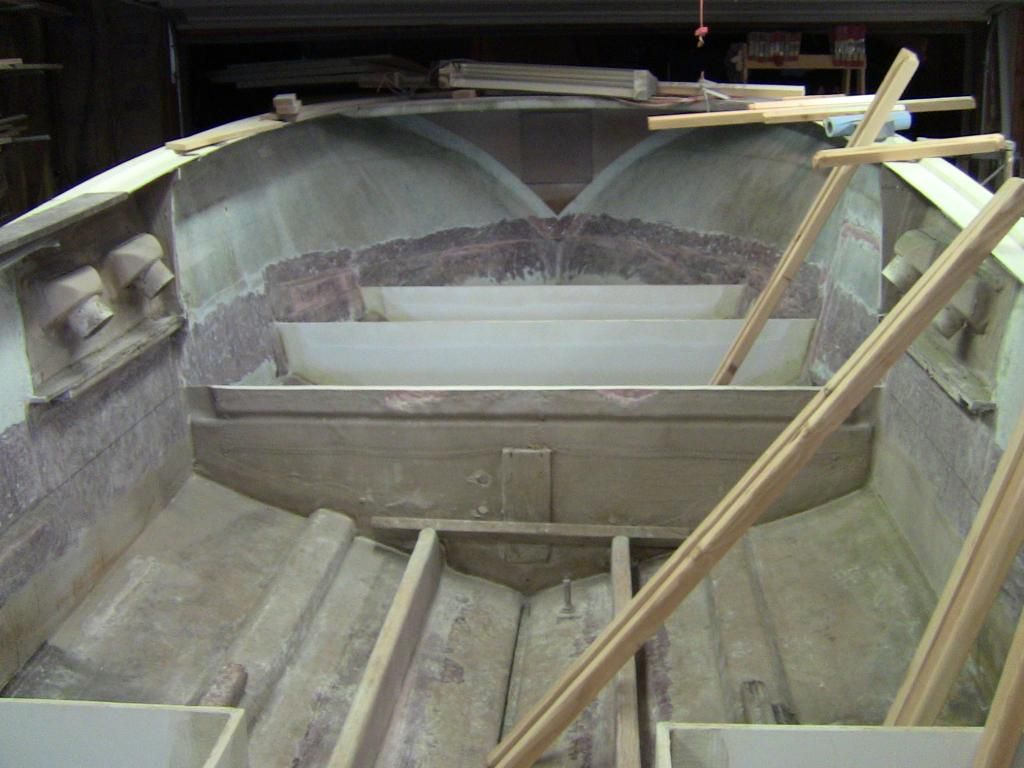
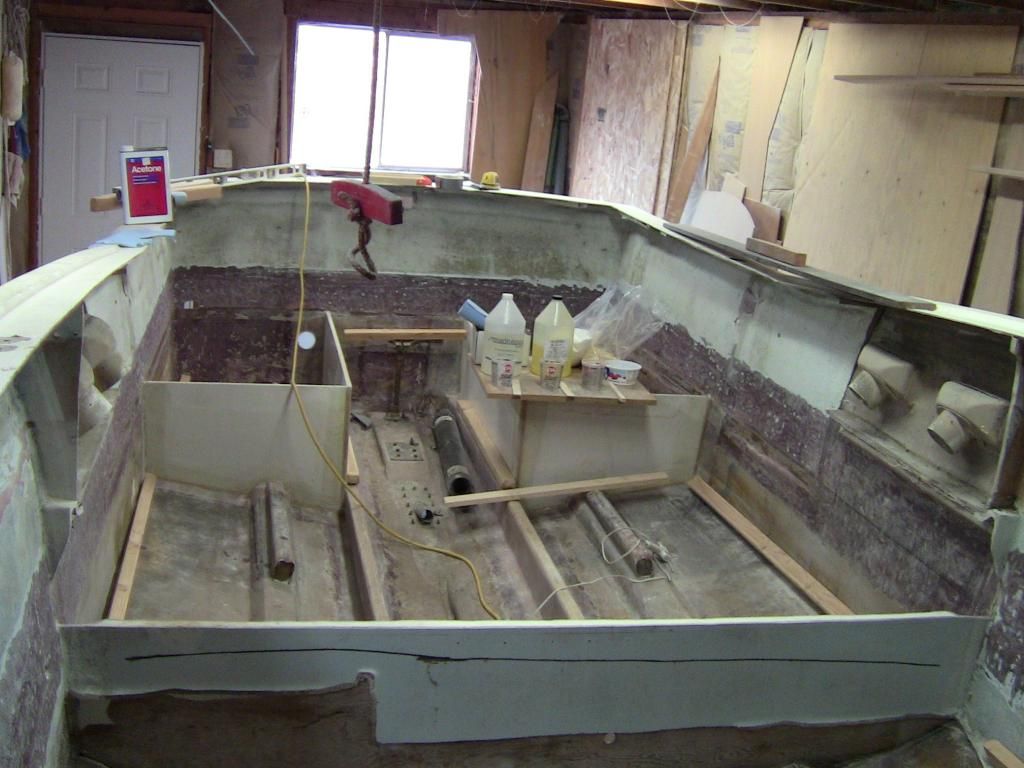
Long gap between posts, and only those who've done big refits on fiberglass hulls will see what really went on. Suffice it to say the white coating of dust on EVERYTHING is what's been taking several hours on several days, and little visible change.
Basically there's been about 50 lbs of fiberglass, paint, and gelcoat removed in prep for bonding the sole in. Tyvek suit, ski goggles, gloves, duct tape, respirator, and some misery. Those who know, know.
On the much brighter side, a shipment or two of stuff has shown up.
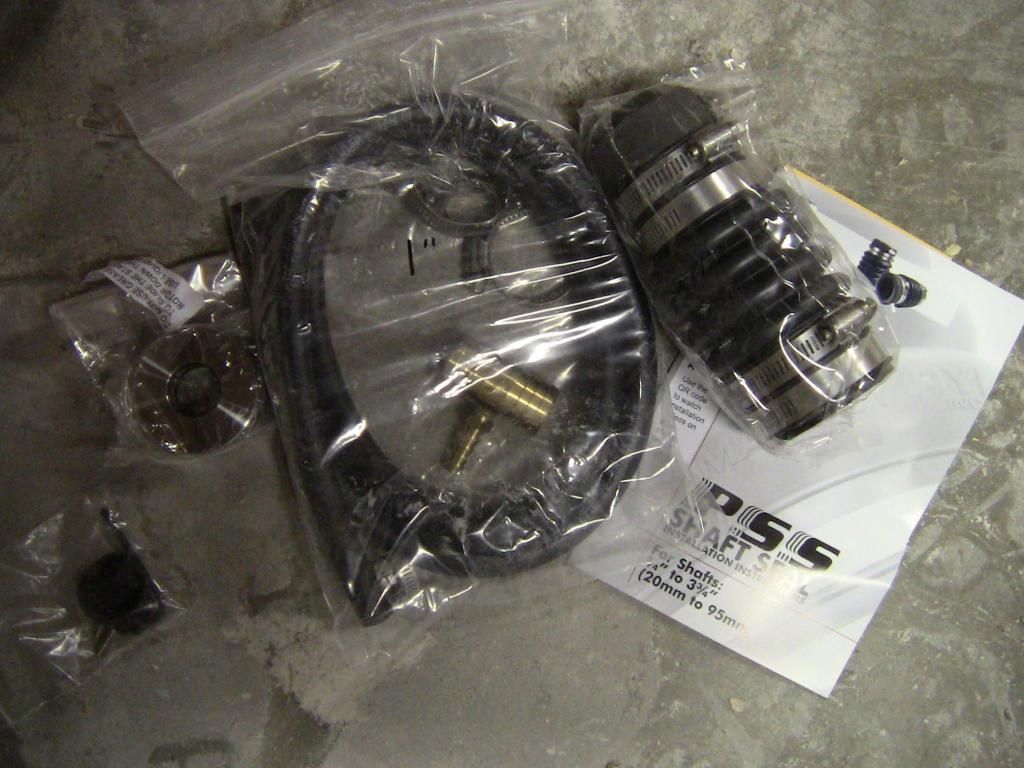
PSS dripless shaft seal. Washington based company, and a dry bilge:
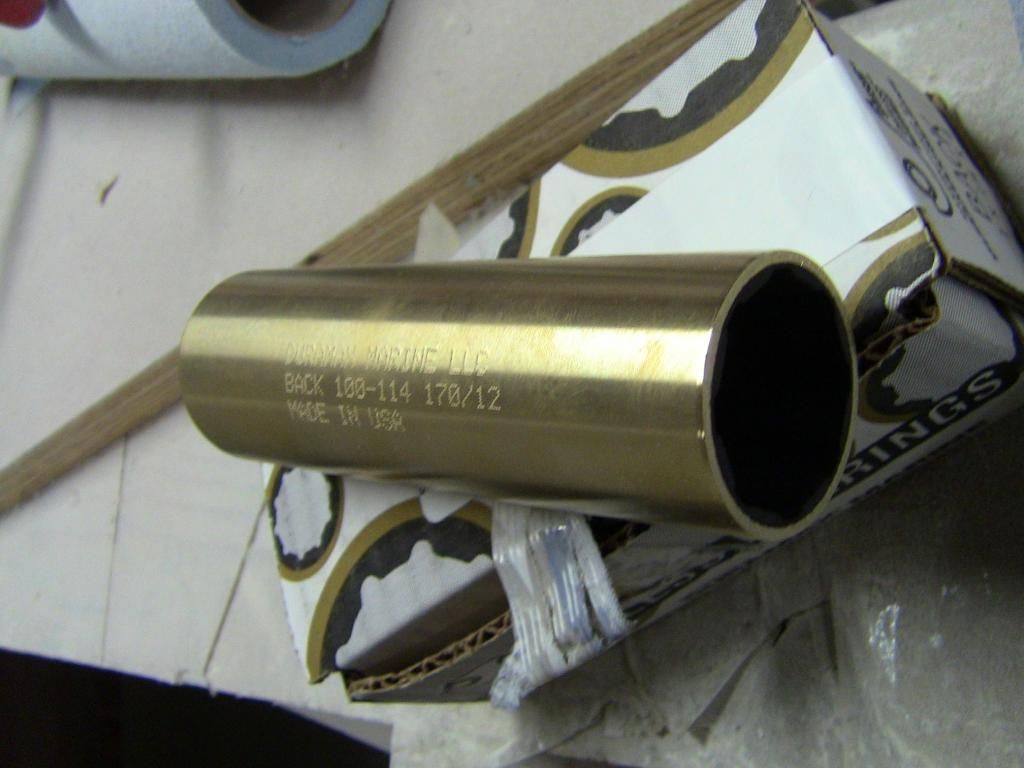
Fresh full length cutlass bearings:
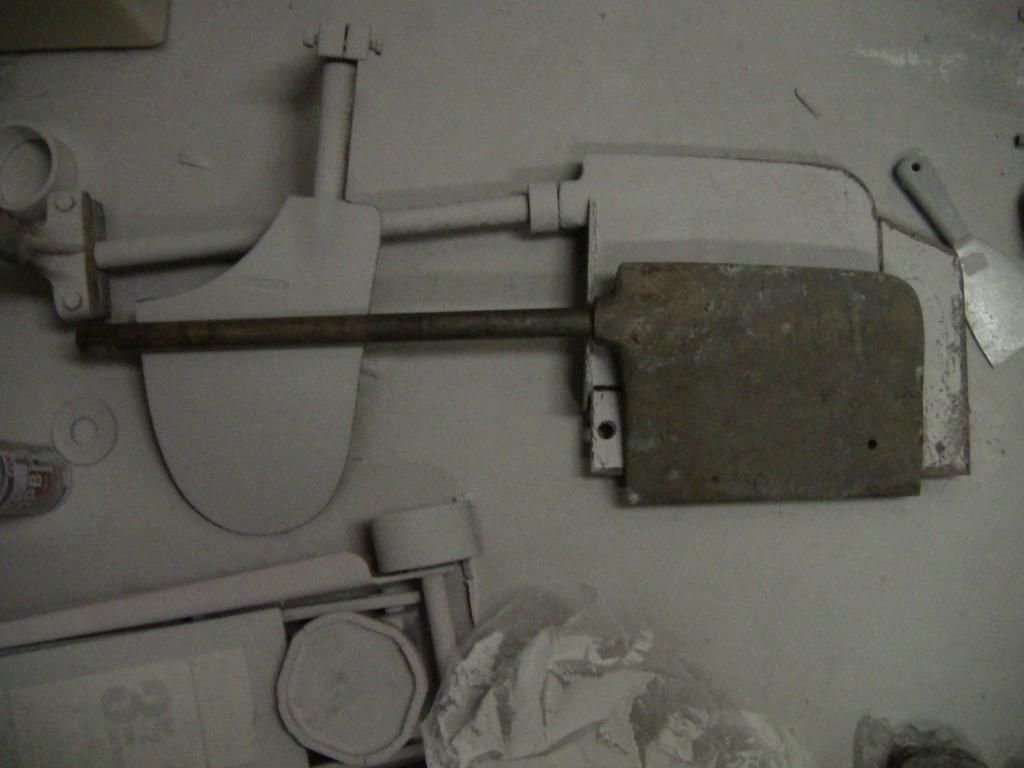
And through an epic show of benevolence and kindness, Darrin sent me his spare rudder from his original Salty Pup. He's had a larger version made that ate up some top end speed but has nice characteristics, so this one might get modified over time, but you can't make changes until you know the performance of the original. A huge thanks go to Darrin for this rudder and all the help he's provided through the build so far.
The fight for a tank went poorly at first. Was planning on custom tanks, but that was insanely expensive. Next up, looked at Moeller PEX tanks, which I'd used on previous builds. Mediocre price wise, but couldn't get enough gallonage in the boat for the sizes of the holes they could go in. Definitely didn't want to go above decks either. Then looked for used plastic, and it was an okay option, minus the $200 shipping charge.
The option I went with, luckily, was local. A welder I used in the past for some other work happened to have a couple tanks sitting on a shelf, so we went to work. First, the bow tank from another boat just needed a little length taken off, and it fit like a champ:
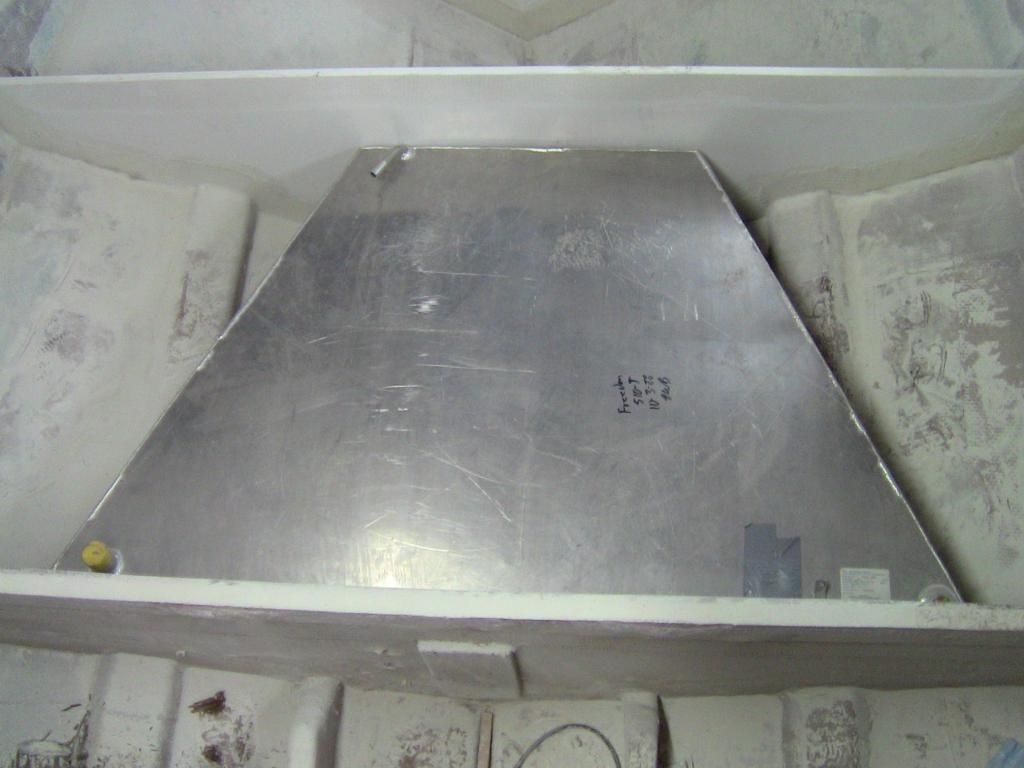
This fit really well in both height and between the V forward. 53 gallons down.
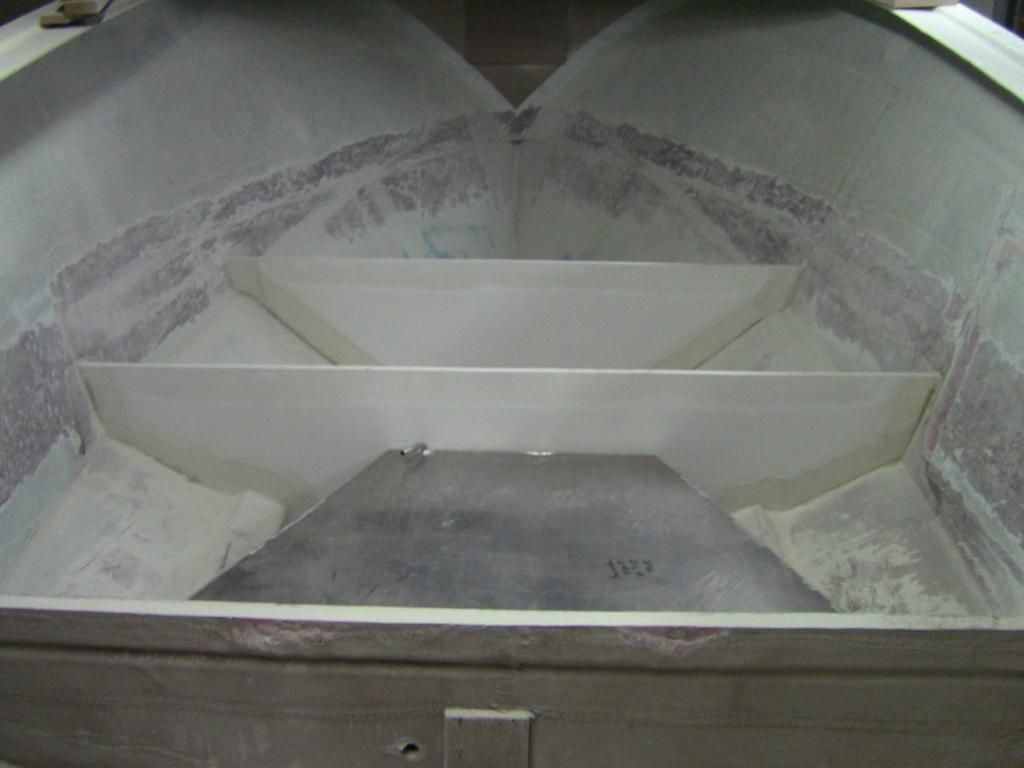
Then he also had a 46 gallon belly tank. Of course there's an engine there that precludes the belly tank idea. However, we took the tank, split it in half, and he welded up new sides where the center line used to be, and voila, 2 side tanks. Here's one in place:
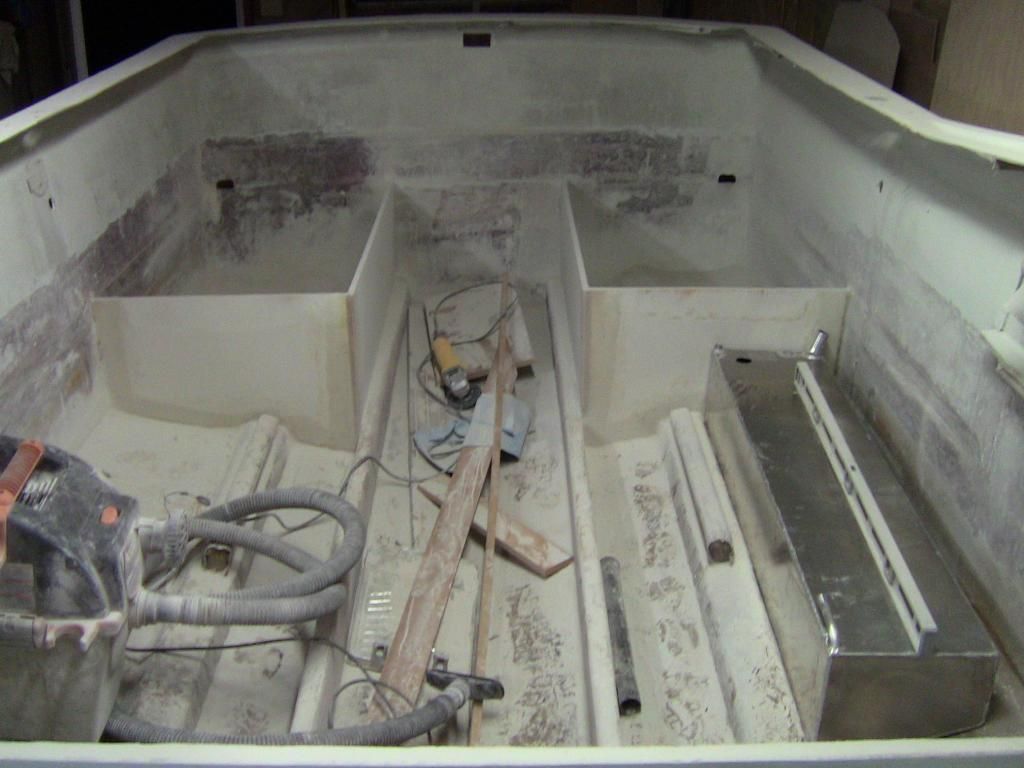
Boom, almost 100 gallons of capacity, all under the sole, all in metal tanks. This should work out both from a clear deck standpoint and a low/balanced weight perspective.
Yes, there's a ton of dust in there. You should see the joint when I'm grinding...
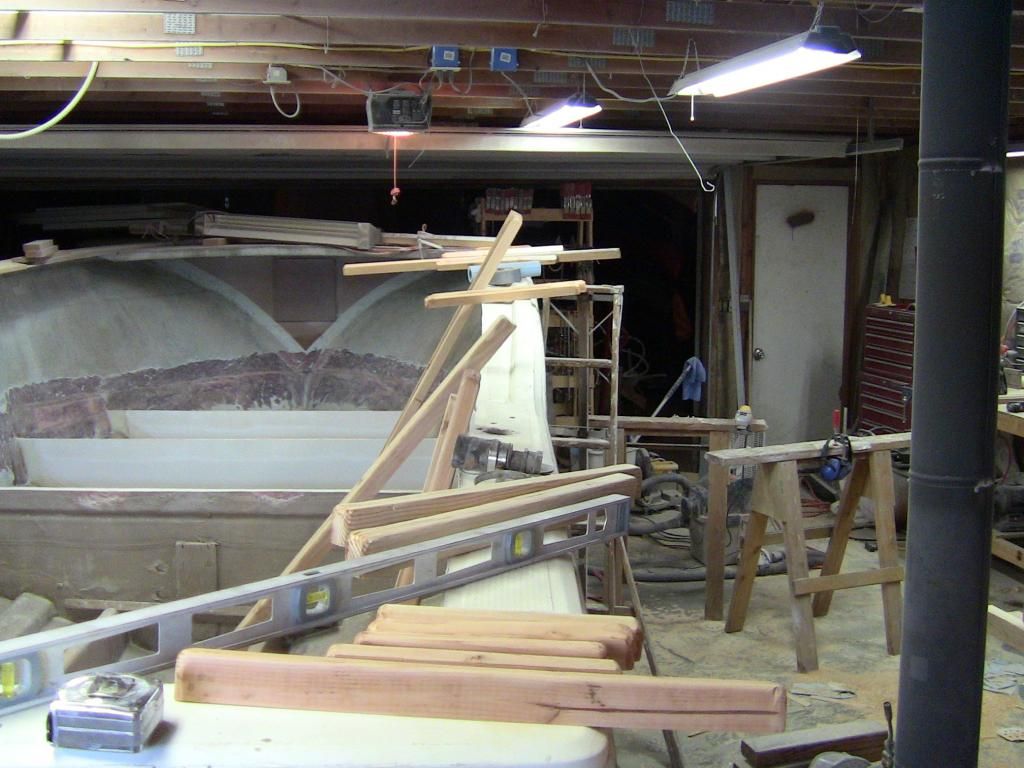
My hope is the last of the grinding will be small. Gonna stick in the 1.5" x 2" cleats along the hull sides to support the sole, glassed in place and wrapped to the hull, then rig the drivetrain, followed by dropping in the sole. Let's hope the wife gives me some quality time to get it done.
E
- Bodofish
- Vice Admiral Three Stars
- Posts: 5401
- Joined: Sun Apr 29, 2007 12:59 pm
- Location: Woodinville
- Contact:
Re: Uniflite Salty Pup Refit
Good to see you're still at it! We need the details...... Size power, what kind of house is going up. You know. I did work on a bunch of boats at Uniflite in the late 70's. Can't say I ever worked on a Salty Pup. Mostly 32' and up gillnetters and cruisers.
Build a man a fire and he's warm for the night. Light a man on fire and he's warm the rest of his life!
- Gisteppo
- Commodore
- Posts: 1016
- Joined: Fri Jun 22, 2007 11:26 am
- Location: Lake Spokane (Long)
- Contact:
Re: Uniflite Salty Pup Refit
She's a 23 foot Salty Pup, 8' wide, 7' at the chines. Power was originally a 318 Chrysler motor that made around 190hp and digested gas.
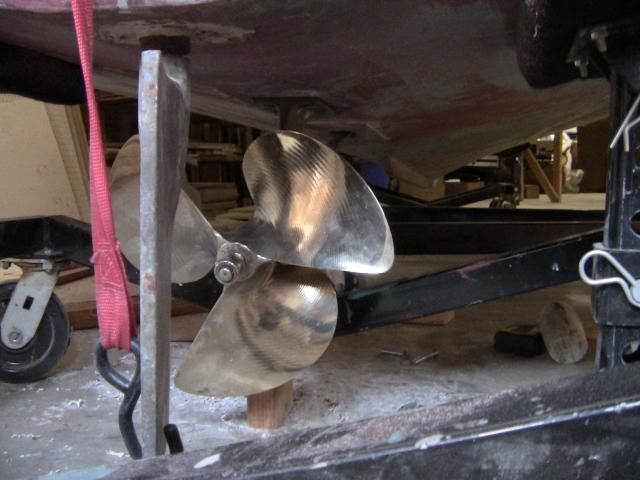
I bought her as a bare hull from a well meaning guy that didn't get anywhere with it. I also picked up a 1986 Malibu Skier for the drivetrain, and it turns out that the 351W fits perfectly, the stringers were the same width. The driveshaft was the same diameter, length, everything just dropped in. Refurbed the prop and we have power. The engine was rebuilt as well as the transmission, and both have around 200 hours.
It will be very similar to the Fish Nautique when completed, and I'll keep you guys posted.
E
- Steelheadin360
- Commodore
- Posts: 1027
- Joined: Wed Nov 02, 2011 4:52 pm
- Location: Snohomish, WA
Re: Uniflite Salty Pup Refit
That is a major project! cant wait to see how it turns out
- Bodofish
- Vice Admiral Three Stars
- Posts: 5401
- Joined: Sun Apr 29, 2007 12:59 pm
- Location: Woodinville
- Contact:
Re: Uniflite Salty Pup Refit
I sure hope you do a nice house like you did on the Dory. They came from Uni with the most gawd awful fugly excuse for a house, but then again it was the way a lot of boats looked back then.
Build a man a fire and he's warm for the night. Light a man on fire and he's warm the rest of his life!
Re: Uniflite Salty Pup Refit
There is a unbelievable morphing of boats, going on! Make's Ton's endeavor look "dingy" by size comparison. I thought hers was a challenge.
I see both boat's laying at rest, beside each other in the garage. And think to myself " your doing what"?
What is the horsepower of the 351w? I am thinking 280+
Edit: After some online searching. That Hp guess, for the 1986 motor, should be closer to 240 when stock. Any mod's to increase horsepower when rebuilt?
- Gisteppo
- Commodore
- Posts: 1016
- Joined: Fri Jun 22, 2007 11:26 am
- Location: Lake Spokane (Long)
- Contact:
Re: Uniflite Salty Pup Refit
I think I'm going to stick with the 240 hp and see how it goes. Basically from stock we've removed at least a thousand pounds of material (cabin, liners, foam, plumbing, water tanks, etc), and she will be built up as a true T-top center console, wide open, good for our Spokane summers. Honestly, it's a smaller project by an order of magnitude from the last one, since there's no cabin and no hardtop. Of course there's far less time as well, with a 1 year old terrorizing the joint.
I've never been one to let the moss grow too much, but project time has dwindled lately. Was hoping to do a scratch build of a Carolina Sportfisher, but stumbled into this thing and it's feeding the need for a while.
E
I've never been one to let the moss grow too much, but project time has dwindled lately. Was hoping to do a scratch build of a Carolina Sportfisher, but stumbled into this thing and it's feeding the need for a while.
E
Re: Uniflite Salty Pup Refit
Interesting floor plan. Should be huge! Enough space for 2 or 3 play pens, for the one year old, scattered about.......LOL! Is there going to be lounge type seating? I don't know what that is. Just seams like ski boats have curved seating arrangements, with lots of pillow soft foam for the soft side of the bum. Curved cushioned seating, is what I am calling "lounge type".Gisteppo wrote:I think I'm going to stick with the 240 hp and see how it goes. Basically from stock we've removed at least a thousand pounds of material (cabin, liners, foam, plumbing, water tanks, etc), and she will be built up as a true T-top center console, wide open, good for our Spokane summers. Honestly, it's a smaller project by an order of magnitude from the last one, since there's no cabin and no hardtop. Of course there's far less time as well, with a 1 year old terrorizing the joint.
I've never been one to let the moss grow too much, but project time has dwindled lately. Was hoping to do a scratch build of a Carolina Sportfisher, but stumbled into this thing and it's feeding the need for a while.
E
Are you or have you been working in the boat building industry?
- Gisteppo
- Commodore
- Posts: 1016
- Joined: Fri Jun 22, 2007 11:26 am
- Location: Lake Spokane (Long)
- Contact:
Re: Uniflite Salty Pup Refit
This is a Fish Nautique, which has the seating/console arrangement I'm trying to accomplish:
Ignore the fighting chair in the middle.
I've never been in the industry, and never took any classes. Basically just learned as I went, and have had good people help along the way to refine the techniques. As such I try to pay the favor forward and put the info out so others realize how they are more than capable themselves. If you've ever met professional boat builders, they're just the same as anyone else, and all it takes is time to learn the skills.
Capt Pete Culler said it best:
"Experience starts when you begin"
E
- Bodofish
- Vice Admiral Three Stars
- Posts: 5401
- Joined: Sun Apr 29, 2007 12:59 pm
- Location: Woodinville
- Contact:
Re: Uniflite Salty Pup Refit
Wow thats going to be great! What a fun project! Take all that weight off the top and you'll be jamm'in. The Uniflte's were always a great hull design, they had Uncle Fed feeding the R&D side. You just can't beat that. Everyone of them I saw was built h3ll stout! You got the tub, should be a slam dunk after the last one! Can't wait to how she turns out.
Build a man a fire and he's warm for the night. Light a man on fire and he's warm the rest of his life!
- Gisteppo
- Commodore
- Posts: 1016
- Joined: Fri Jun 22, 2007 11:26 am
- Location: Lake Spokane (Long)
- Contact:
Re: Uniflite Salty Pup Refit
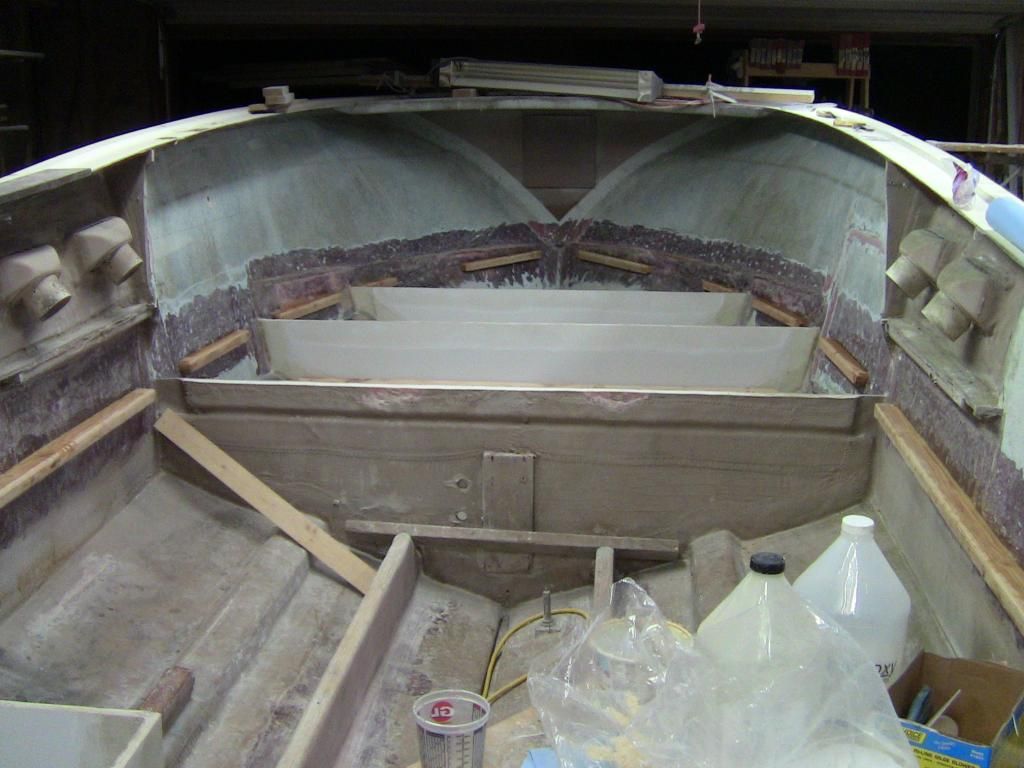
Well, we've got the bulkheads in, now it's time to make some landings for the sole on the hull sides and stiffen some stuff up. Like we've talked about in the past, I'm making this a stiffer, stronger version of her former self because she was a 12-18kt boat, and will be an 18-30kt boat when done.
She originally had liners of solid glass everywhere but the fish deck aft. Heavy, bulky, and impossible to replicate. Instead, we're doing a version of what the fish deck had, but all the way around the boat. These are high graded, resinous Doug Fir stock that's been profiled for a full glass wrap against the hull:
Here you can clearly see the eleventy-seven miles of grinding that had to be done. Ah well, good prep work makes for good final products.
All prepped with the sticky stuff work table. Note that it's light out.
There's no way I'm going to bugger in a bunch of holes to screw these in place, so I used a modified hot glue technique that worked like a champ. Just a little spot of wood and a couple dabs of hot glue held even the longest pieces of fir in place. Butter up the rest of the mating surface with epoxy and off we went.
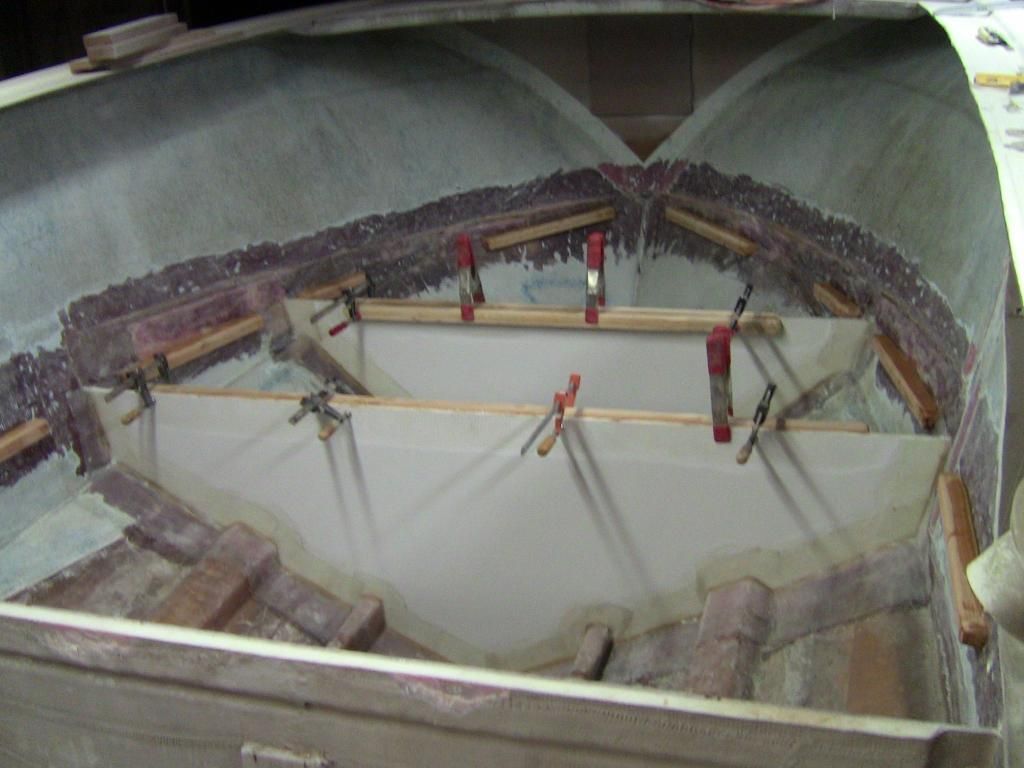
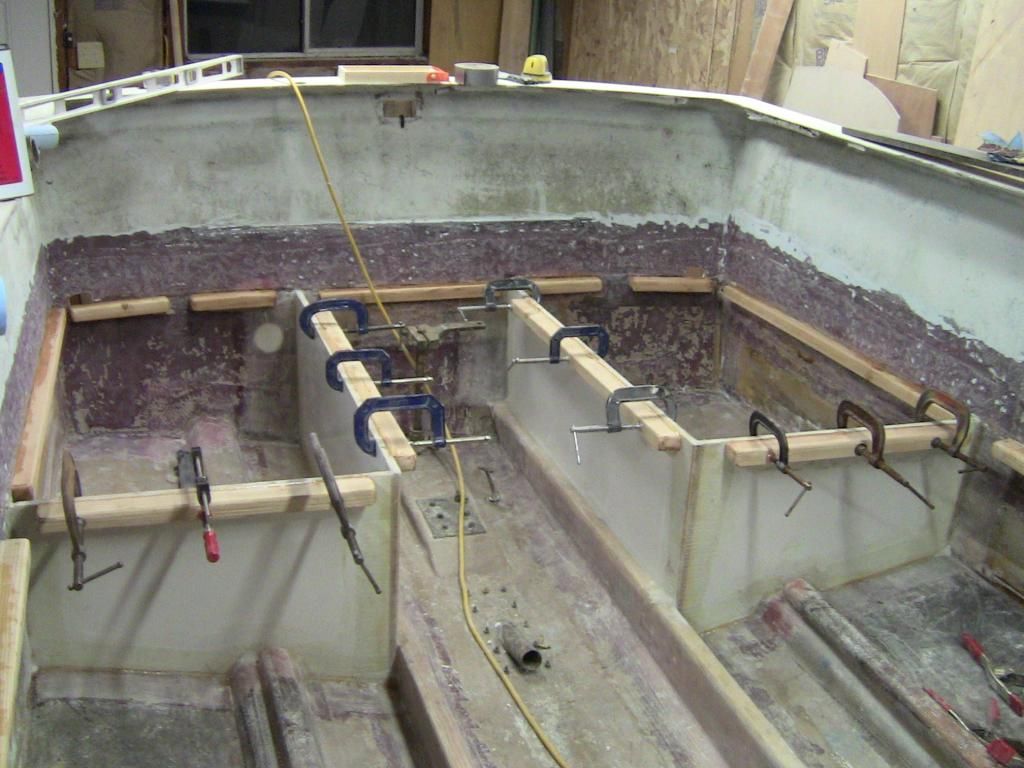
Then just for a little extra beef and larger landings, cleats were added to the bulkheads. The face near the camera on the white bulkhead has the cleat omitted so that the fuel tank will drop in. There's a double thickness cleat on the other side to make up the strength.
Lastly the big beef on the ballast/fish tanks.
Next I'll be wrapping all of these with glass above and below. Not sure if it'll be biax or cloth, as I have some of both. Biax probably will happen on the long ones, but cloth might suffice elsewhere. These will provide lots of gluing surface and support for the sole, which will also be heavily taped in place.
Now that these are in, there will be some rigging and engine work soon. Glad to be on the construction end, and thinking toward splashing her for some sea trials to do final rigging.
E
Re: Uniflite Salty Pup Refit
Nice thread, and nice build! Glad to see you back around Eric! I love DIY build threads.
- Bodofish
- Vice Admiral Three Stars
- Posts: 5401
- Joined: Sun Apr 29, 2007 12:59 pm
- Location: Woodinville
- Contact:
Re: Uniflite Salty Pup Refit
She's looking really good!!!! I know she's going to be a thing of beauty.
Build a man a fire and he's warm for the night. Light a man on fire and he's warm the rest of his life!
- Gisteppo
- Commodore
- Posts: 1016
- Joined: Fri Jun 22, 2007 11:26 am
- Location: Lake Spokane (Long)
- Contact:
Re: Uniflite Salty Pup Refit
Wow, that long break sucked.
Had to do some kitchen work for SWMBO, got the last of the little remodel jobs that were looking bad finished. Drawers in the old dishwasher hole, new doors installed, blah blah blah.
Meanwhile, back to the Pup;
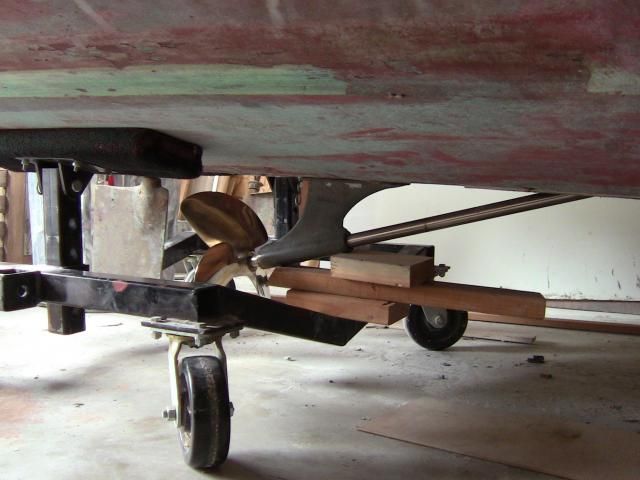
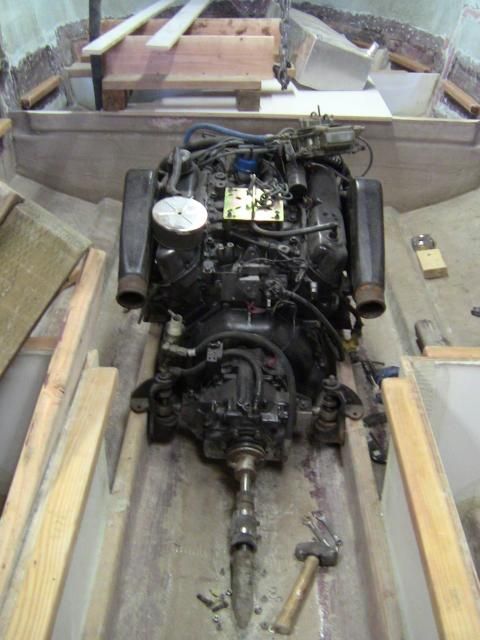
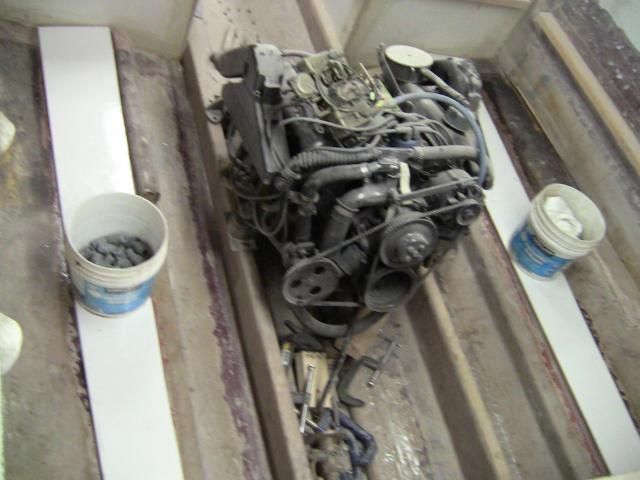
I was thinking Id screw with sanding out under the engine and painting so I'd only have to hoist and set it one more time. Came to my senses and just tossed it in the boat. That gave the opportunity to get rigged and hang the strut.
The holes don't line up at all compared to the old strut, but some epoxy and milled fibers filled those up and fresh holes for the new strut location. Looks like we will have 1.5" of clearance from the bottom of the hole with 3/4" of shaft between prop and strut.
That results in the new engine location. Appears to be right at the old engine location. This time, rather than wimpy little lag bolts that are going to corrode and eat up the stringer, I'll be doing stainless through bolts into 26" long stainless backing plates clamping on the stringers. Much beefier, and bedded so that there's no rot issue. Exhaust will be the only funny part, as there will need to be a little curve to get between the ballast tanks.
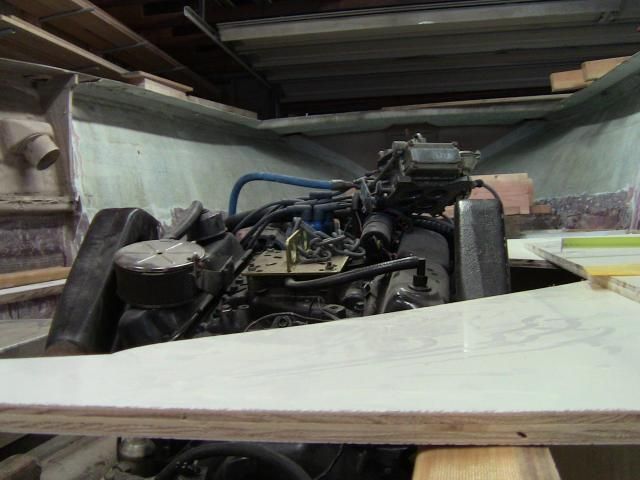
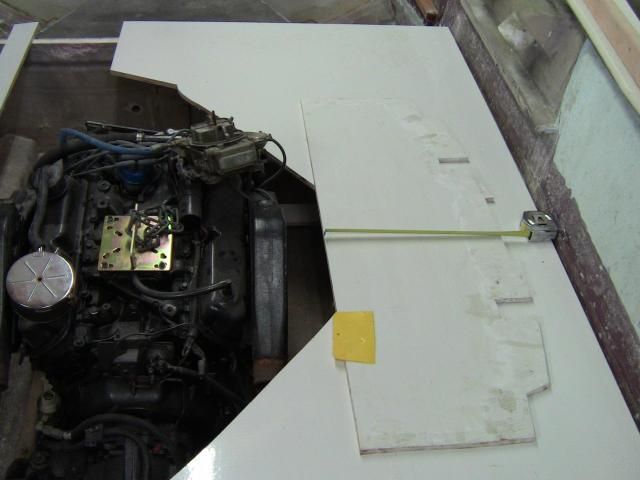
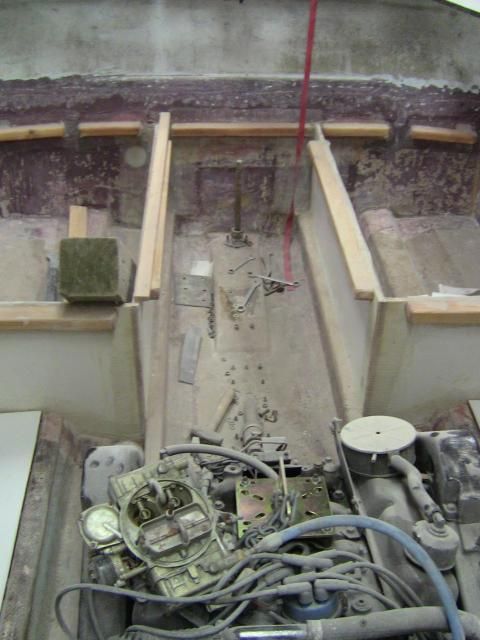
Then I got all excited and dropped in the tanks, which will get small beds put in soon. Once that was in place, I slid a little chunk of my sheet stock in to get an eye on where the sole will be and how to integrate some systems. Check out how little of the engine is above the sole:
If I keep a 5" gap around the outside of the manifolds, there's going to be a minimum of 18" of walkway space. How's that suit those of you that have messed with inboard center consoles? Decent walk-thru space? I also did a little test reach with material in place, looks like the starter is still reachable, but won't be the easiest to get out with the console tilted.
Pulleys will be easy to get to, water pump, etc. Spark plugs aren't too hard either, though I want to make sure not to have the same problems others have had with small work spaces on inboard CC's.
Man I just wish I had more time to work on this thing...
E
- Gisteppo
- Commodore
- Posts: 1016
- Joined: Fri Jun 22, 2007 11:26 am
- Location: Lake Spokane (Long)
- Contact:
Re: Uniflite Salty Pup Refit
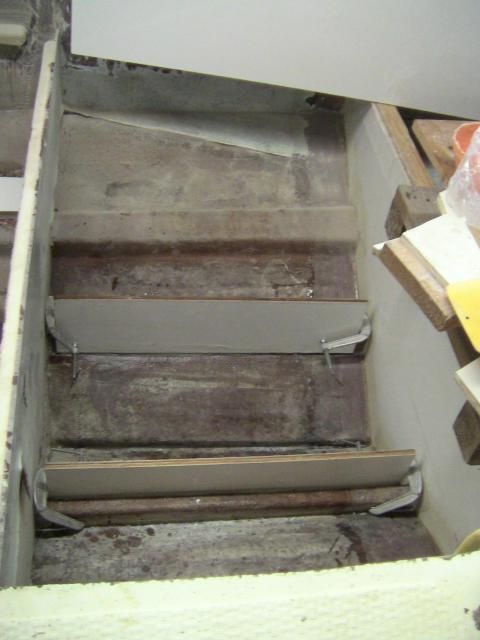
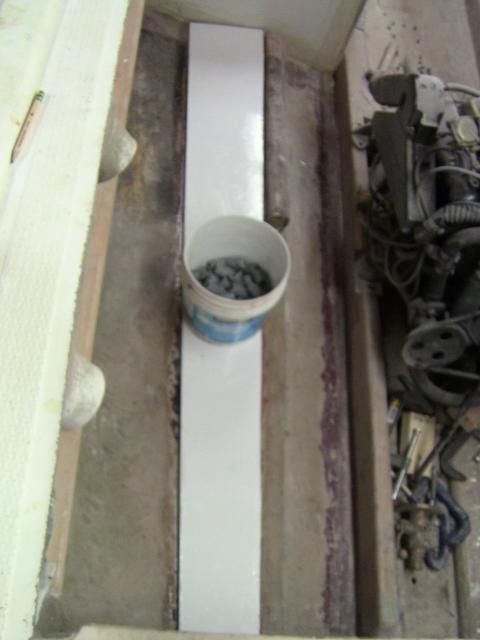
Played around with how the tanks were going to go in the boat and found a way to mount the front tank firmly, but still couldn't get the side tanks nailed down without having the tank bottom rub around on the hull planking. That's a recipe for holes, so opted to make some tank pads, epoxied in place on the planking and stringer.
Forward, the big triangular tank will sit on these vertical stringers and be screwed to the frames fore and aft. Thinking either some strips of HDPE on top of those, or neoprene, or even some gelcoated glass. Anyone have good intel for that?
Found what shape was necessary to make a level spot for the tanks next to the engine and made the pads. Epoxied in place to the hull planking, that was the biggest unsupported area of hull skin in the boat, and now it has a stiffener in place. Currently just a FAT bead of epoxy thickened with milled fibers, haven't decided if I will add some tabbing to it or not.
Tanks will have tabs that mount to the tank pads, to the bulkhead aft, and to the sole support cleat above to fix them in 3 dimensions. Don't want fuel tanks flopping around in the bilge
Question time:
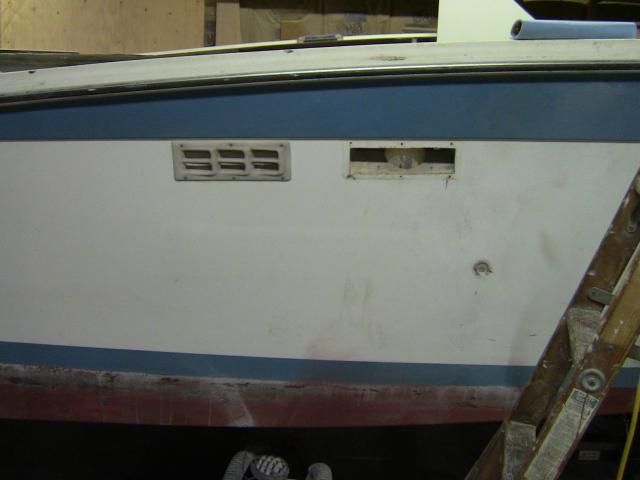
Trying to decide if I will keep these engine room vents and add new screens, or put in the big ass Vetus ones.
Also looking at different ways to do the rudder. Original rudder had the tiller arm at the top, but there's a wealth of problems with that plan for fitment. Thinking of bolting a bracket to the strut bolts, then running my cable low and adding a keyway to the shaft and a tiller arm about 3" above the stuffing box. Anyone have details on pros or cons to that agenda?
Tanks are getting the final mods done, and I'm about to drop a grand on rigging bits to start getting her assembled. Also going to bore holes for engine mounts and start getting serious about progress.
E
Re: Uniflite Salty Pup Refit
Can I ask a potentially dumb question? Why are gas tanks installed next to the engine? Must be for weight distribution? Isn't the engine the hottest, most likely to spark area in the boat? I know liquid fuel is pretty stable. But fumes, that is a different story!
Just curious, and interested to hear the opinion of a boat builder/fabricator with your incredible talent.
- Gisteppo
- Commodore
- Posts: 1016
- Joined: Fri Jun 22, 2007 11:26 am
- Location: Lake Spokane (Long)
- Contact:
Re: Uniflite Salty Pup Refit
You'd be shocked to see how most production boats are built.
Using aluminum tanks, the entire fuel system will be pressure tested to 3psi, and all lines are vented overboard. Blowers handle the possible errant vapors initially on startup (usually bleeding out of the carburetor), and tons of air ducting keeps the fresh, cool air in the bilges. I doubt the temps below the deck will get over 120F while running even on hot days, since the hull contact with cold water keeps things reasonably chilly.
The distance between the tank and the 180 degree exhaust manifold is more than 18", so nothing is particularly close.
Just as an interesting tidbit, most small block inboards have their fuel filter (small aluminum can with gas in it) bolted DIRECTLY to the exhaust manifold!
E
- Bodofish
- Vice Admiral Three Stars
- Posts: 5401
- Joined: Sun Apr 29, 2007 12:59 pm
- Location: Woodinville
- Contact:
Re: Uniflite Salty Pup Refit
Can't say I've ever seen one bolted to an exhaust manifold but it wouldn't be a big deal as they're water cooled. You just might be surprised at how much heat the dog house and bilge can hold. The biggest vents you can get away with are just right. I've seen many boat that will gain 100 or better rpm just by lifting the dog house.
Build a man a fire and he's warm for the night. Light a man on fire and he's warm the rest of his life!
- Gisteppo
- Commodore
- Posts: 1016
- Joined: Fri Jun 22, 2007 11:26 am
- Location: Lake Spokane (Long)
- Contact:
Re: Uniflite Salty Pup Refit
As of right now we have about double the needed airflow, and I'm going to be replacing the little vents with bigger vents that should be about 4 times what the engine requires.
She'll be cool and breathe easy...
E
She'll be cool and breathe easy...
E
- Bodofish
- Vice Admiral Three Stars
- Posts: 5401
- Joined: Sun Apr 29, 2007 12:59 pm
- Location: Woodinville
- Contact:
Re: Uniflite Salty Pup Refit
Nice! That Detroit iron can move a lot of air.
Build a man a fire and he's warm for the night. Light a man on fire and he's warm the rest of his life!